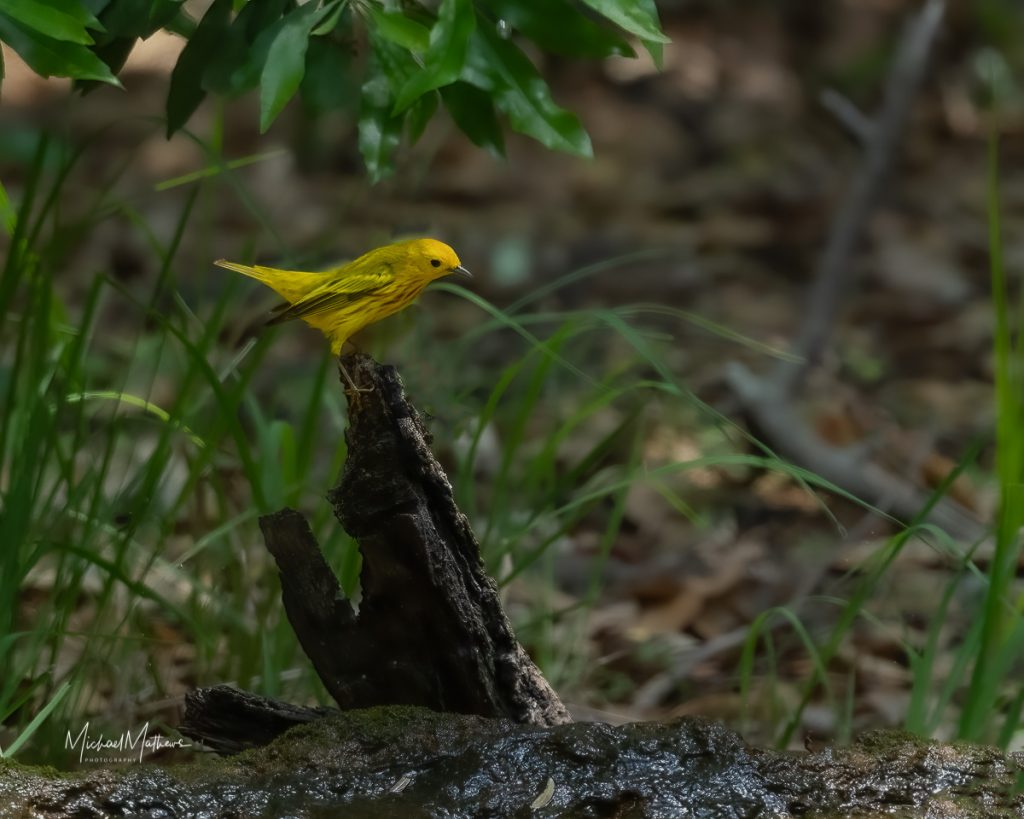
Yellow Warbler
Surviving the Dull Skies, Deep Shadows, and “Why Did I Even Bring My Camera?” Days
Every birder has been there.
You finally get out to your favorite hotspot. The birds are active. You spot a lifer. You raise your camera, focus, shoot—and check the back of your screen to find a photo that looks like it was taken in a coal mine during a thunderstorm. Gray bird, gray sky, gray mood.
Congratulations: you’ve just entered the emotional gauntlet known as bird photography in bad light.
But before you throw your camera into the lake or give up bird photography in favor of stamp collecting, take a deep breath. With the right techniques, settings, and mindset (plus possibly a little coffee-fueled optimism), you can get good shots—even in the gloom.
What Exactly Is “Bad Light”?
Let’s define our foe.
Bad light includes:
- Heavy overcast skies that make everything look dull and lifeless
- Dense shade (like under a forest canopy)
- Backlit birds (hello, silhouettes!)
- Early dawn or late dusk with little ambient light
- Harsh midday sun—yes, that’s bad light too, just the blinding kind
In all of these, the main issue is insufficient or uneven lighting, which causes:
- Motion blur (slow shutter speeds)
- High ISO noise
- Washed out or muddy colors
- Loss of detail, especially in shadows or highlights
- An overwhelming urge to sob gently into your viewfinder
Let’s fix that.
Step 1: Accept That You’re Not Shooting for National Geographic Today
Bad light means compromise. You might not get your best-ever photo. That’s okay. The goal now is:
- Capture the moment
- Keep it sharp
- Fix what you can later
Release the expectation of perfect and embrace present. Some of your most interesting or emotional bird photos will come from these moody conditions.
Step 2: Dial In Your Camera Settings for Survival Mode
Use Manual Mode or Shutter Priority
Priority #1: Shutter speed. Birds don’t pause for low light.
- Small songbirds: 1/1000 or faster
- Larger birds (herons, hawks): 1/800 is usually okay
- Perched birds: 1/500 can work if they’re still, and you’re steady
Use Auto ISO
Let your camera adjust ISO automatically to preserve that shutter speed. Set a maximum ISO you’re comfortable with—something like 6400 (or 12,800 if you’re feeling bold and shoot full-frame).
Pro Tip: Grainy-but-sharp beats smooth-and-blurry every time.
Step 3: Open the Aperture—Wide
Use the widest aperture your lens allows. f/2.8, f/5.6, even f/6.3—whatever gives you the most light. Yes, you’ll get shallow depth of field, but you’re not photographing a marching band. You just need the bird to be sharp.
Step 4: Exposure Compensation Is Your Friend
In low contrast situations (gray bird, gray sky), your camera might underexpose.
Use +1/3 to +1 EV exposure compensation to brighten things up.
In backlight, you might need even more—sometimes +2 EV.
Pro Tip: Always check your histogram. If everything’s smushed to the left, bump up that exposure until you’re not shooting in visual mud.
Step 5: Choose Your Background Wisely
In bad light, background becomes everything. A dark bird against a bright sky? Disaster. But that same bird against green foliage or warm earth tones? Magic.
- Move your body to change the angle
- Use trees, reeds, or even dirt as backdrops
- Try to keep the brightest part of your frame behind you, not behind the bird
Step 6: Embrace Silhouettes (When All Else Fails)
If the light is hopeless but dramatic, lean in.
- Perch the bird against the sunrise or sunset
- Lower your exposure and let the bird go black
- Highlight shape, pose, and setting instead of detail
Silhouettes are moody, bold, and honestly kind of poetic—like your camera’s way of writing bird haiku.
Step 7: Post-Processing: The Gloom Slayer
You will need to edit. No shame in it.
Use your editing software (Lightroom, etc.) to:
- Increase shadows and whites (carefully)
- Reduce noise, especially in the background
- Add a touch of contrast and vibrance to bring life back
- Selectively brighten the bird without destroying the background
And for the love of feathers: don’t try to make a 10,000 ISO photo look like it came from a studio shoot. Enhance, don’t invent.
Step 8: Use Flash or Fill Light (If You Dare)
Some purists will tell you using flash in bird photography is cheating. Ignore them—especially when you’re shooting in a rainforest at 5:00 a.m. and can’t see your own feet.
- A gentle fill flash or a Better Beamer setup can bring out detail in shadowy conditions.
- Be ethical. Don’t flash nocturnal or nesting birds.
- Use flash sparingly and soften it with a diffuser or modifier.
Sometimes, a tiny pop of light is all it takes to turn “meh” into “marvelous.”
Bonus Tip: Shoot in Burst Mode and Pray
In low light, even small body movements can cause blur. Shooting a burst (5–10 frames) increases your odds that one of them will be sharp.
You only need one keeper. Just one.
Final Thoughts: Embrace the Mood
Bird photography in bad light teaches patience, humility, and a deep appreciation for getting it right in-camera (or trying really, really hard).
Some of your favorite shots won’t be the brightest or sharpest—but they’ll have mood, texture, and story. A woodpecker clinging to bark in thick fog. A heron silhouetted against a steel-gray sky. A wren glowing softly in dawn light filtering through the mist.
That’s bird photography. And no light—good, bad, or downright awful—can take the joy out of that.

More Stories
How to Edit Bird Photos Without Making the Cardinal Look Radioactive
How to Customize Your Nikon Z9/Z8 for Bird-in-Flight Shots
How to Set Back Button Focus – Nikon Z9 and Z8